A year ago I joined a team which made heavy use of the Java Reactor library for their pub-sub system. Reactor is a library for high-performance, parallel programming using a functional API. The code tends to look like this:
Flux.from(p)
    .ofType(SubscribeToShardEvent.class)
    .flatMapIterable(SubscribeToShardEvent::records)
    .limitRate(1000)
    .buffer(25)
    .subscribe(e -> System.out.println("Record batch = " + e))
Back when I first encountered Reactor, some of the Reactor terms like flatMapIterable sounded familiar but when I modified the programs, they behaved unexpectedly. If you’re new to Reactor and need a sample program to play with its concepts, this article may be for you. My goal is to provide an article that would have given past-me a leg up in learning Reactor.
Let us build a program that pauses for 10 seconds, then performs 3 computations in parallel. To do this in Reactor, we need a few concepts
Concepts
A pub-sub system is one where a publisher sends data to a receiver, called a subscriber. In general, a publisher is the source of data to be consumed by a subscriber and this relationship is set up via a subscription. Here’s the basic (Java) Reactor API
public interface Publisher<T> {
    public void subscribe(Subscriber<? super T> s);
}

public interface Subscriber<T> {
    public void onSubscribe(Subscription s);
    public void onNext(T t);
    public void onError(Throwable t);
    public void onComplete();
}

public interface Subscription {
    public void request(long n);
    public void cancel();
}
A subscriber subscribes to a publisher and the publisher sends the subscriber a subscription. The subscriber can then request data from the publisher (of type T) which the publisher will send by calling onNext on the subscriber; the subscriber requests a number of elements (up to infinity) and the publisher sends them at its own pace:
Publisher.subscribe(Subscriber)
Subscriber.onSubscribe(Subscription)
Subscription.request(n)
Subscriber.onNext(T)
Subscriber.onNext(T)
...
Subscriber.onComplete()
A Mono is a Publisher that produces 0 or 1 elements, and a Flux is a Publisher that produces n elements.
Armed with these concepts, we can restate our programming goal: we shall create a Flux that pauses for 10 seconds then produces 3 elements in parallel.
Also, since testing is a standard practice in software development, let’s ensure that we write tests for each part of our implementation. These tests will help us experiment with different ways of producing the same behavior, since we can be confident that our tests will catch regressions.
To follow along, you should be familiar with Java 8 and JUnit, and know a bit about Java build tools like Maven.
Setup the Reactor Environment
To start with Reactor, create a new Maven project in your integrated development environment (IDE) and place the following snippet in your pom file and you’re ready to go
<?xml version="1.0" encoding="UTF-8"?>
<project xmlns="http://maven.apache.org/POM/4.0.0"
         xmlns:xsi="http://www.w3.org/2001/XMLSchema-instance"
         xsi:schemaLocation="http://maven.apache.org/POM/4.0.0 http://maven.apache.org/xsd/maven-4.0.0.xsd">
    <modelVersion>4.0.0</modelVersion>

    <groupId>org.example</groupId>
    <artifactId>tmp-reactor</artifactId>
    <version>1.0-SNAPSHOT</version>

    <!-- Use at least Java 8 -->
    <build>
        <plugins>
            <plugin>
                <groupId>org.apache.maven.plugins</groupId>
                <artifactId>maven-compiler-plugin</artifactId>
                <configuration>
                    <source>8</source>
                    <target>8</target>
                </configuration>
            </plugin>
        </plugins>
    </build>

    <!-- Set the version for all Reactor dependencies -->
    <dependencyManagement>
        <dependencies>
            <dependency>
                <groupId>io.projectreactor</groupId>
                <artifactId>reactor-bom</artifactId>
                <version>Dysprosium-RELEASE</version> <!-- Search.maven.org for the latest release -->
                <type>pom</type>
                <scope>import</scope>
            </dependency>
        </dependencies>
    </dependencyManagement>

    <dependencies>
        <!-- Reactor production classes -->
        <dependency>
            <groupId>io.projectreactor</groupId>
            <artifactId>reactor-core</artifactId>
        </dependency>

        <!-- Reactor testing classes -->
        <dependency>
            <groupId>io.projectreactor</groupId>
            <artifactId>reactor-test</artifactId>
            <scope>test</scope>
        </dependency>

        <!-- Unit tests -->
        <dependency>
            <groupId>org.junit.jupiter</groupId>
            <artifactId>junit-jupiter</artifactId>
            <version>5.6.2</version>
            <scope>test</scope>
        </dependency>
    </dependencies>
</project>
Emit 3 Numbers Sequentially
Now we’re ready to code. Let’s review a 5-step method that produces a Flux of 3 elements sequentially (we’ll add more features later).
class SourceTest {
    @Test // 1
    void shouldEmit3Items() {
        StepVerifier.create(new Source().emit()) // 2
                .expectNextCount(3) // 3
                .verifyComplete(); // 4
    }
}

class Source {
    public Flux<Integer> emit() {
        return Flux.just(1, 2, 3); // 5
    }
}
-
For this example we are using JUnit to make it easy to verify that
emitbehaves correctly. It also makes the code easy to run from the integrated development editor (IDE). -
StepVerifieris a Reactor class, and a Subscriber for testingMonos andFluxes i.e. Publishers. Publishers do nothing until they’ve been subscribed to. Here we subscribe toSource::emitand -
Expect to receive any three elements from the publisher.
-
Verify that we’ve reached the end of the stream.
-
FYI
Flux::justcallsonCompleteon its subscribers after it is done emitting the elements it has been passed.
Perform a Side Effect for Each Number
Let’s refine emit by making it perform a side effect before emitting each item. It now looks like:
class Source {
    public Flux<Integer> emit() {
        return Flux.just(1, 2, 3)
                .flatMap(x -> sideEffect().thenReturn(x)); // 1
    }

    private Mono<Void> sideEffect() { // 2
        return Mono.fromRunnable(() -> System.out.println(Thread.currentThread().getName())); // 3
    }
}
-
flatMapcan takeMonos andFluxes. In this case,flatMapexecutes aMono(fromsideEffect) then returns the value it was passed.thenReturnwaits forsideEffectto finish before returning a value. -
The return type of
sideEffectisMono<Void>meaning that theMonoemits no items. If the return type was, say,Mono<Integer>then we could move the thenReturn call inemitintosideEffect. -
Mono.fromRunnableis a way to make aMonothat executes an arbitrary method. Here we print out the name of the thread to show that everything is running sequentially.
Running the test shouldEmit3Items should show the name of your main thread 3 times in the console:
main
main
main
Perform the Side Effects in Parallel
Let’s force the side effects into their own threads. There isn’t a good way to unit-test this behavior so we’ll rely on the console to ensure this works.
class Source {
    public Flux<Integer> emit() {
        return Flux.just(1, 2, 3)
                .flatMap(x -> sideEffect().thenReturn(x));
    }

    private Mono<Void> sideEffect() {
        return Mono.delay(Duration.ofSeconds(0))  // 1
                .then(Mono.fromRunnable(() -> System.out.println(Thread.currentThread().getName()))); // 2
    }
}
-
Using
delayhere is a hack to force the side effect into a different thread. In practice, you’d make, a Webflux HttpHandler or AWS DynamoDB or some other async call, which would naturally switch threads. -
Kind of like
thenReturn,thenis used to chainMonos together.
Running the test shouldEmit3Items should now show the names of 3 different threads in the console. Run it multiple times to see the thread names switch places.
parallel-3
parallel-2
parallel-1
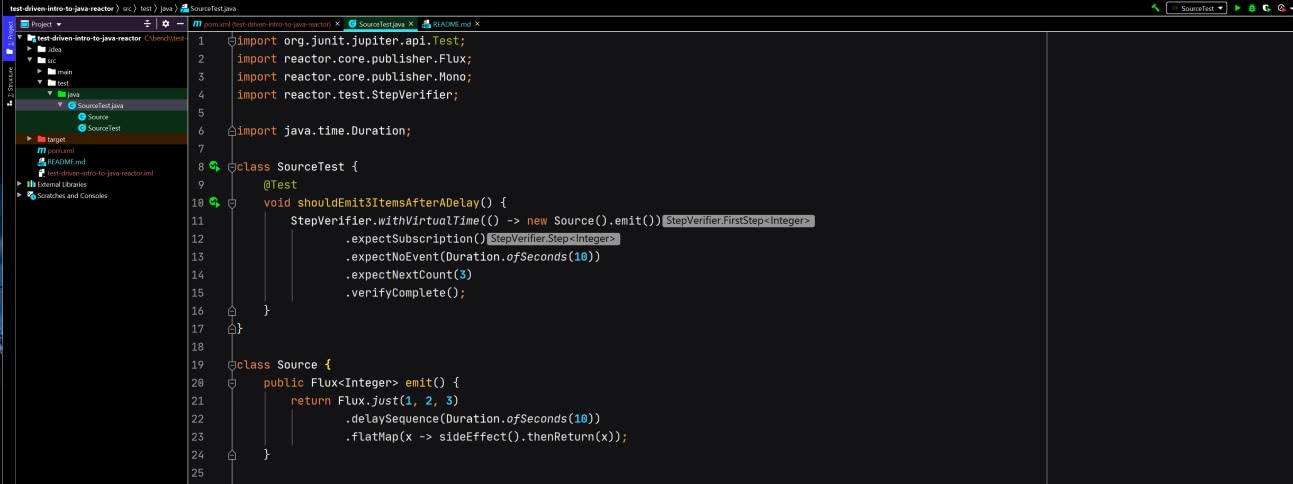
Delay Before Emitting the First Number
What if we wanted to delay for 10 seconds before emitting the first element? This is easily testable
class SourceTest {
    @Test
    void shouldEmit3ItemsAfterADelay() {
        StepVerifier.create(new Source().emit())
                .expectSubscription()
                .expectNoEvent(Duration.ofSeconds(10)) // 1
                .expectNextCount(3)
                .verifyComplete();
    }
}

class Source {
    public Flux<Integer> emit() {
        return Flux.just(1, 2, 3)
                .delaySequence(Duration.ofSeconds(10)) // 2
                .flatMap(x -> sideEffect().thenReturn(x));
    }

    private Mono<Void> sideEffect() {
        return Mono.delay(Duration.ofSeconds(0))
                .then(Mono.fromRunnable(() -> System.out.println(Thread.currentThread().getName())));
    }
}
-
expectNoEventexpects that no events are signaled to theSubscriber. Examples of events areonNext, andonCompleteandonSubscribe. Yes, subscribing to a publisher triggers an event, so if you omitexpectSubscriptionon the line above, this test will fail. -
delaySequenceadds a delay before emitting the first element in theFlux.
Our newly renamed test, shouldEmit3ItemsAfterADelay, takes up to 10 seconds to see if it passes. To get rid of this delay, modify the test as follows:
class SourceTest {
    @Test
    void shouldEmit3ItemsAfterADelay() {
        StepVerifier.withVirtualTime(() -> new Source().emit()) // 1
                .expectSubscription()
                .expectNoEvent(Duration.ofSeconds(10))
                .expectNextCount(3)
                .verifyComplete();
    }
}
Sadly, this causes the console output to show all the side effects running on the same thread
 main
 main
 main
withVirtualTime works by switching to a single thread and then manipulating the system clock. We can regain the multithreaded behavior even in this test with some extra hacking, but the test suffices for now so we’ll end here.
All the code we’ve created can be found at this git repo.
Conclusion
In this article, we’ve gotten a feel for writing multi-threaded Reactor code. Here are some more resources to achieve fluency with it.
The Reactor docs are complete although they almost assume familiarity with Reactor’s programming model to begin with. It takes at least a couple of reads to understand all the special cases they point out. See Appendix A for a cheat sheet.
The Reactive Manifesto explains the why behind Reactor’s programming model. It assumes familiarity with developing streaming applications where the cost of compute resources is a concern. See the Java specification of Reactive Streams for details on why each line of the Reactive API is the way it is.
Finally, Notes on Reactive Programming is a three-part series of articles on Reactor and reactive programming. Parts 2 and 3 contain progressively more involved code samples.
As with anything, if you play with Reactor enough it will make intuitive sense.
Thanks to Travis Klotz for sharing his Reactor expertise with me.