What's the quickest and easiest way to deploy a serverless API to AWS? If you're an absolute expert in configuring and managing AWS API Gateway, then maybe it's by writing cloudformation templates and deploying your code. However, if you're like me and often want to spin up APIs quickly to test out a proof of concept, configuring API Gateway by hand can really slow down your development process. Luckily, there's an open source Serverless framework out there that can help us avoid manually configuring all the resources needed for deploying an AWS API behind API Gateway.
Getting Started
To get started using the Serverless Framework, you'll need to install the framework
on your machine. Then you'll run the serverless command
to initialize the framework. You may be asked to create a Serverless account, however
with the open source framework, you should be able to use it without creating an account.
We will need an AWS account in order to deploy our API, if you don't have one already you can create one.
If you haven't configured your AWS account on your machine, follow these instructions
to get set up. Once everything has been initialized, we're ready to start developing our API!
In this example I am writing my API in Typescript, however you can use your preferred
language, as long as it is supported by AWS Lambda. To get started, create a new directory
for your project, and run serverless create --template aws-nodejs-typescript in that
directory. This will bootstrap your project with a bare-bones typescript API implementation.
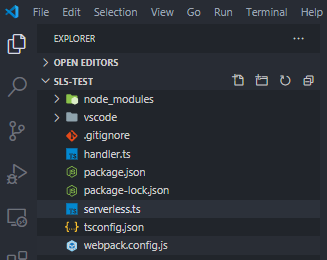
Let's take a closer look at what it created for us.
handler.ts holds the code that our API will run. In this case it will run the hello function, which returns a 200 status code, a message and the input event.
serverless.ts is the main configuration file that the Serverless framework will use to package and deploy our API. This could also be converted to yml and saved in the serverless.yml file for the framework to use.
Configuration
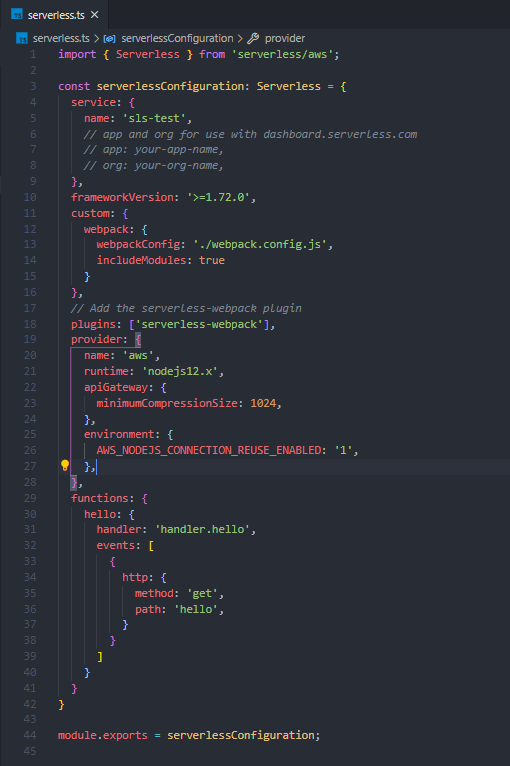
There are plenty more configuration options you can try within the serverless.ts file, but for now we'll take a deeper dive into the configuration that was generated for us.
The service configuration only has the name of your service to be deployed. I usually just use the name of the project I'm working on.
frameworkVersion defines what version of the Serverless Framework to use with this project.
The custom configuration object lets you define any properties you want. Those properties can be referenced later in the configuration, or used to configure third party plugins. In this case we have some webpack configuration properties, that will be used by the serverless-webpack plugin that is defined in the plugins property.
The provider section describes the service provider this application will be deployed to, and what options to use with that provider. In this case we are going to deploy to AWS and use version 12 of node.js as our runtime.
Finally, the functions configuration describes the functions that will be registered to our API endpoints. Going a little further, we will have a function called hello that will execute the code in handler.ts when called. The events that will cause this function to execute will be an HTTP GET request, on the /hello path of our API.
Build and Deploy
Since we have an understanding of the configuration and set up of our project, we can proceed with building and
deploying our project to our AWS account. To build our project, run the serverless package command from the root of
your project. When this command completes you should see a new directory named .serverless in your project (If you can't see
the directory you may need to allow hidden directories to be visible on your machine). This directory
contains the resources required to deploy our API to AWS. Let's take a look at what Serverless has generated for us.
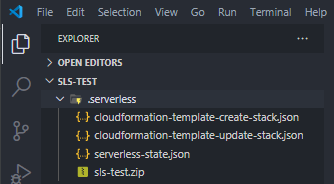
cloudformation-template-create-stack.json is a Cloud Formation template that will deploy a bucket and is used to create the Cloud Formation stack for our API.
cloudformation-template-update-stack.json is the Cloud Formation template that holds the bulk of the resources needed to host and serve our API. This file is around ~300 lines of JSON, which was generated from our ~40 line serverless.ts configuration file. That's a lot of lines of JSON that Serverless has saved us from writing on our own! For more complex projects, Serverless will save us even more time. You can take some time to peruse this file to see what resources Serverless will spin up in your AWS account.
The project-name.zip file is the artifact created for deployment to AWS Lambda. It contains the packaged code along with any dependencies our code needs to run.
Once we have our Serverless artifacts, we can run the serverless deploy command to deploy our API. This command will also
build a new .serverless artifact directory, and this is the recommended means of deployment. However, you can pass the
path to your Serverless artifacts to deploy a pre-built API with serverless deploy -p path-to-package.
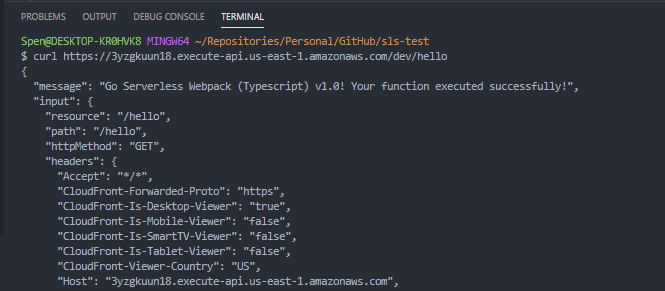
When the deployment completes, you should see some output from Serverless which will include your API endpoints. We can test
that our API is working successfully by running curl endpoint-url from the command line. If everything is working
we should get a successful response with the message Go Serverless Webpack (Typescript) v1.0! Your function executed successfully!.
By leveraging the Serverless Framework, we can save ourselves a lot of time that would be spent writing hundreds of lines of Cloud Formation templates. We also save ourselves the trouble of having to manually piece together all the components of a functioning API Gateway. With all that time saving, we can increase our time to market for new products, or easily show off a working proof of concept to stakeholders.